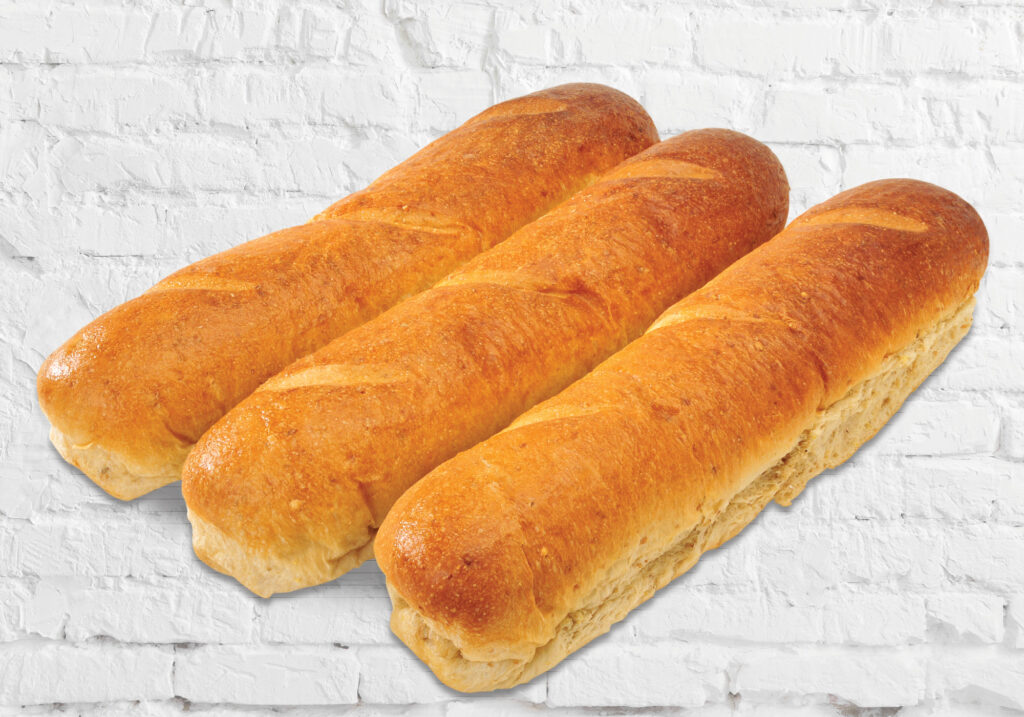
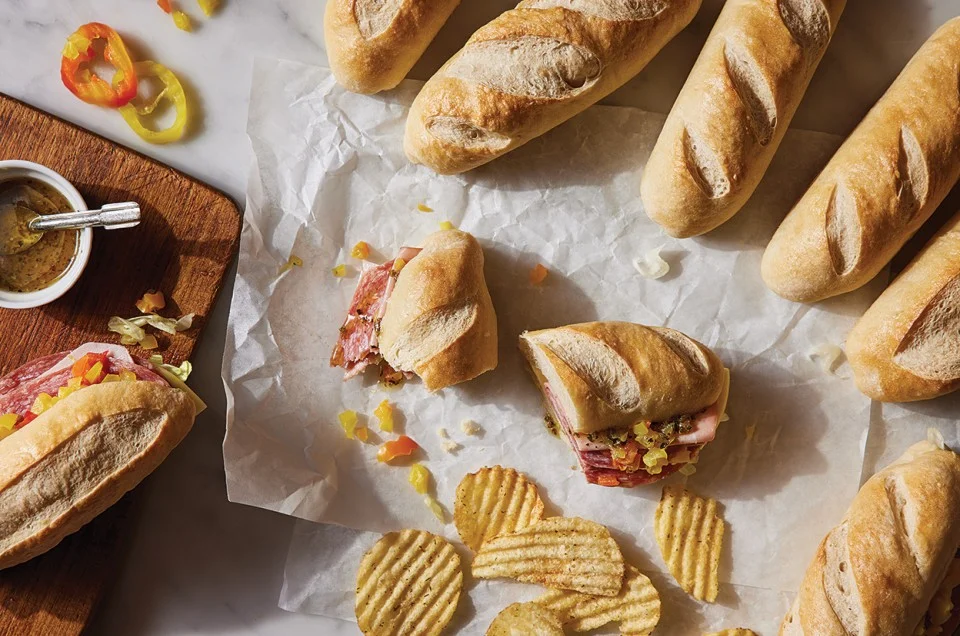
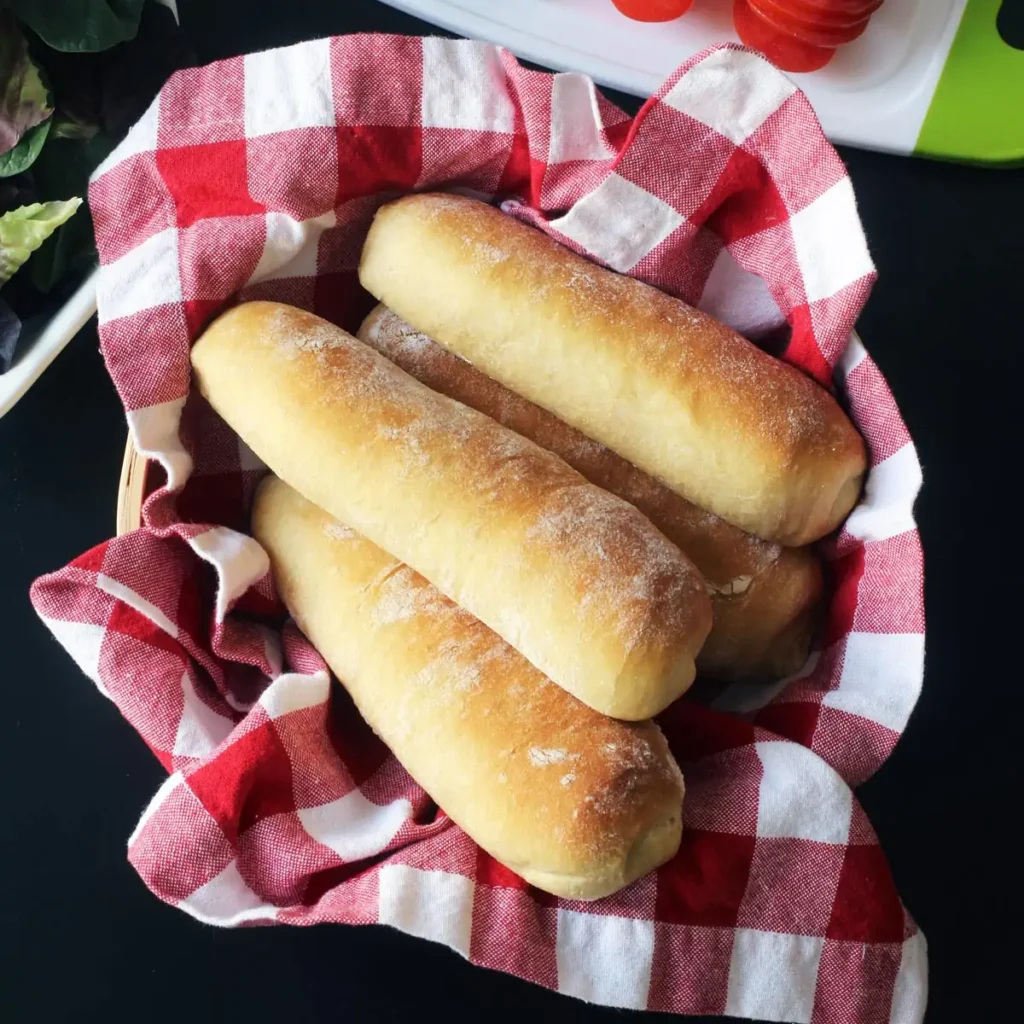
Sub bread, commonly known as submarine sandwich bread, is a fundamental component of the beloved sub sandwich, cherished for its delightful crunch on the outside and soft, airy interior. Typically measuring about six to twelve inches in length, this bread is distinctive for its elongated, cylindrical shape, which resembles a submarine, hence its name.
The texture of sub bread is crucial; it must be sturdy enough to hold generous fillings without tearing, yet tender enough to bite through easily. This balance is achieved through a specific baking process that creates a thin, crispy crust and a fluffy center. The ingredients are simple yet essential, primarily consisting of flour, yeast, water, salt, and sometimes sugar and fats, which enrich the dough and enhance flavor.
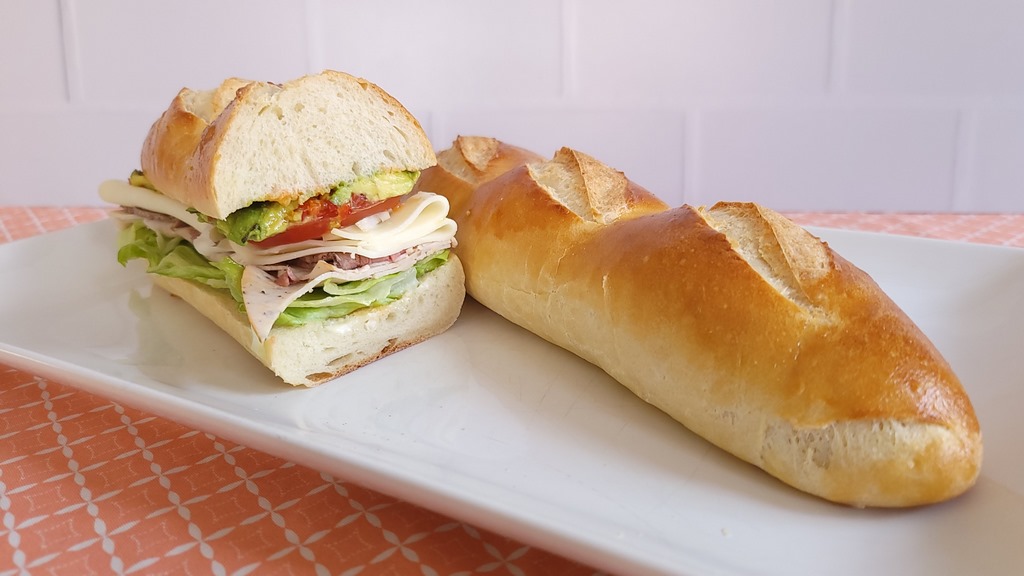
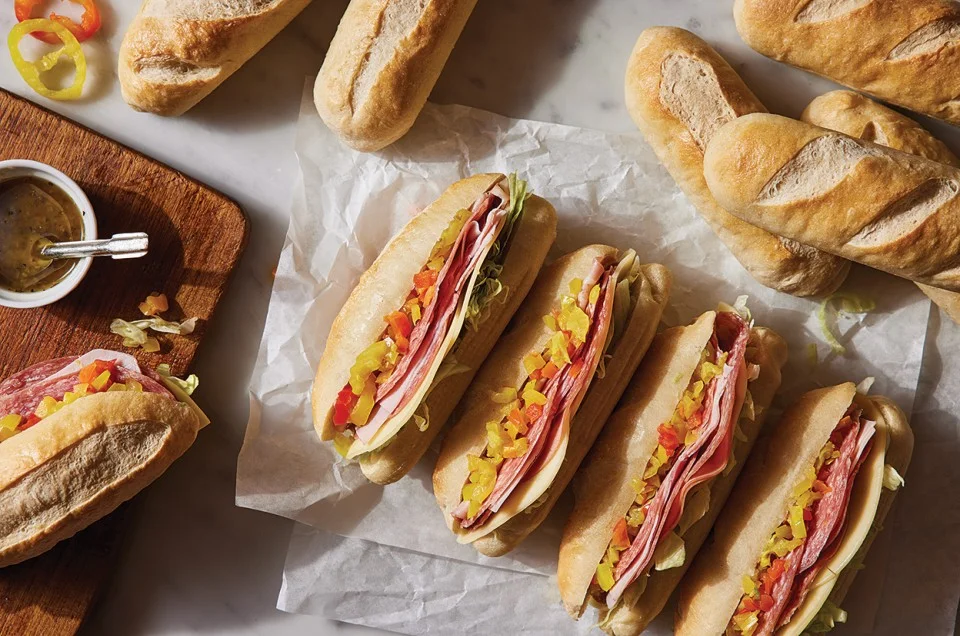
Sub bread serves as the perfect canvas for an array of ingredients, from classic Italian cold cuts and cheeses to diverse fillings like tuna salad, meatballs, or veggie delights. The bread’s neutral taste complements the fillings, making it a versatile choice for sandwich lovers. Whether lightly toasted or enjoyed as is, sub bread transforms simple ingredients into a satisfying meal that’s enjoyed worldwide.
Kitchen Tools Needed
Ingredients for Sub Bread
How To Make Sub Bread?
Preparing the Yeast Mixture
Begin by activating the yeast to ensure it’s alive and ready to help your bread rise. In a large mixing bowl, dissolve the sugar in warm water. Sprinkle the active dry yeast over the top and let it sit for about 5 minutes. You should see the mixture become frothy, indicating that the yeast is active.
Mixing the Dough
Once the yeast is ready, add the olive oil and salt to the bowl. Gradually mix in the all-purpose flour, one cup at a time, until a soft dough forms. It might be sticky initially, but as you knead, it will become more elastic and easier to handle.
Kneading the Dough
Turn the dough out onto a lightly floured surface and knead it for about 8 to 10 minutes. You’re aiming for a smooth, elastic dough that springs back slightly when poked. If the dough is too sticky, add a little more flour as you knead, but be careful not to make it too dry.
First Rise
Place the kneaded dough in a lightly oiled bowl, turning it once to coat it with oil. Cover the bowl with a clean kitchen towel or plastic wrap. Let the dough rise in a warm, draft-free area until it has doubled in size, about 1 to 1.5 hours.
Shaping the Dough
Once the dough has risen, gently punch it down to release any air bubbles. Turn it out onto a lightly floured surface again. Divide the dough into four equal parts. Roll each part into a log shape, roughly 6 to 8 inches long. This will form the classic sub bread shape.
Second Rise
Line a baking sheet with parchment paper and sprinkle it lightly with cornmeal if desired. Place the shaped loaves on the baking sheet, leaving ample space between them. Cover them lightly with a kitchen towel and let them rise again until nearly doubled in size, about 30 minutes.
Baking
Preheat your oven to 375°F (190°C). Once it’s hot and the loaves have risen, you might brush the tops with a little olive oil for a golden crust. Bake the bread in the preheated oven for about 25 minutes, or until the loaves are golden brown and sound hollow when tapped.
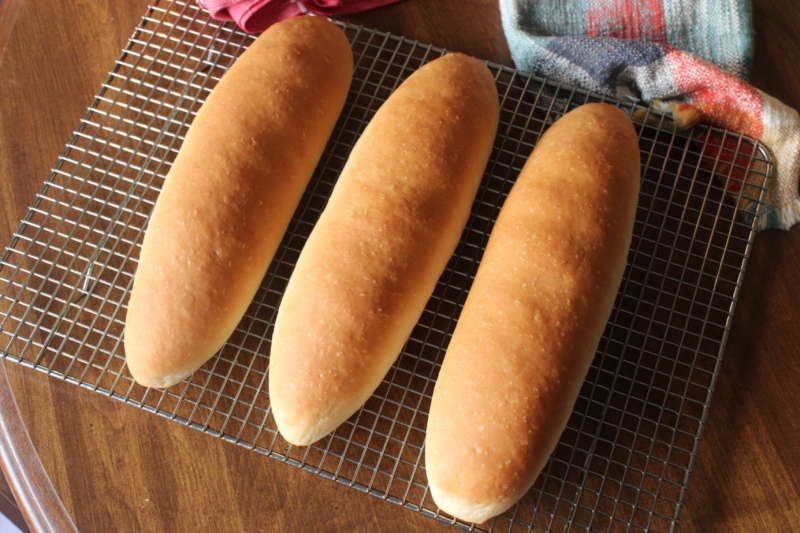
Cooling
Remove the baked bread from the oven and place them on a wire rack to cool. This prevents the bottoms from becoming soggy. Let the bread cool completely before slicing to ensure the structure sets properly, making it easier to slice and fill with your favorite sandwich ingredients.

What temperature to proof dough at?
The ideal temperature for proofing dough is around 75°F to 85°F (24°C to 29°C). This warm environment activates the yeast effectively, encouraging fermentation and helping the dough to rise properly. If your kitchen is cooler, you can place the dough in a slightly warmed oven (turned off after preheating briefly) or near a warm appliance. Always avoid excessively hot locations, which can kill the yeast and prevent the dough from rising, impacting the texture and flavor of your final bread.
What to serve with Sub Bread?
Tips For Perfect Results
Variations for Sub Bread
Substitutions for Sub Bread
Health Benefits of Sub Bread
Carbohydrates for Energy: Sub bread is a good source of carbohydrates, providing the body with fuel needed for daily activities. Carbs are essential for brain function and energy throughout the day.
B Vitamins: Whole grain or enriched sub breads are a source of B vitamins such as folate and niacin. These vitamins help in energy production and the maintenance of healthy skin, hair, and eyes.
Fiber Boost: Opting for sub bread made from whole grains increases your dietary fiber intake. Fiber aids in digestion, helps control blood sugar levels, and can contribute to cholesterol management.
Protein Content: Bread made with high-protein flours, such as whole wheat, contributes to your daily protein intake, which is vital for muscle repair and growth.
Low in Fat: Generally, bread is low in fat, making it a suitable option for those managing their fat intake for health reasons.
Versatility for Balanced Eating: Sub bread can be part of a balanced meal by choosing healthful fillings like lean proteins, plenty of vegetables, and healthy fats like avocado or olive oil.
Making Ahead
Sub bread can be prepared in advance to streamline meal preparation. You can make the dough a day before you plan to bake it. After the first rise, punch down the dough, cover it tightly, and refrigerate overnight. The cold slows the yeast activity but doesn’t stop it, allowing a slow, extended rise that can enhance the flavor of the bread.
Storage
To keep sub bread fresh after baking, cool it completely on a wire rack to prevent condensation that can make the crust soggy. Once cool, wrap the bread in a clean, dry cloth and store it at room temperature for up to 2 days. For longer storage, wrap the bread in plastic wrap or aluminum foil, and then place it in a freezer bag. Sub bread can be frozen for up to 3 months. Thaw at room temperature when ready to use.
Reheating
Sub bread is best enjoyed when it’s warm and crispy. To reheat, preheat your oven to 350°F (175°C). If the bread has been refrigerated or kept at room temperature, lightly dampen the crust with water to help re-crisp it as it heats. Wrap the bread in aluminum foil and place it in the oven for about 10 to 15 minutes. If reheating from frozen, no need to thaw; just increase the heating time by a few minutes to ensure it is heated through and the crust is crispy.
Nutritional Facts
Additional Nutritional Information
Considerations

Frequently Asked Questions – FAQ’s

Sub Bread
Course: MainCuisine: AmericanDifficulty: Easy4
servings2
hours25
minutes210
kcalIngredients
2 teaspoons of active dry yeast
1 cup of warm water (about 110°F to 115°F)
1 tablespoon of sugar
1 tablespoon of olive oil
1 teaspoon of salt
3 cups of all-purpose flour, plus extra for dusting
Cornmeal for dusting the baking sheet (optional)
Directions
- Begin by activating the yeast to ensure it’s alive and ready to help your bread rise. In a large mixing bowl, dissolve the sugar in warm water. Sprinkle the active dry yeast over the top and let it sit for about 5 minutes. You should see the mixture become frothy, indicating that the yeast is active.
- Once the yeast is ready, add the olive oil and salt to the bowl. Gradually mix in the all-purpose flour, one cup at a time, until a soft dough forms. It might be sticky initially, but as you knead, it will become more elastic and easier to handle.
- Turn the dough out onto a lightly floured surface and knead it for about 8 to 10 minutes. You’re aiming for a smooth, elastic dough that springs back slightly when poked. If the dough is too sticky, add a little more flour as you knead, but be careful not to make it too dry.
- Place the kneaded dough in a lightly oiled bowl, turning it once to coat it with oil. Cover the bowl with a clean kitchen towel or plastic wrap. Let the dough rise in a warm, draft-free area until it has doubled in size, about 1 to 1.5 hours.
- Once the dough has risen, gently punch it down to release any air bubbles. Turn it out onto a lightly floured surface again. Divide the dough into four equal parts. Roll each part into a log shape, roughly 6 to 8 inches long. This will form the classic sub bread shape.
- Line a baking sheet with parchment paper and sprinkle it lightly with cornmeal if desired. Place the shaped loaves on the baking sheet, leaving ample space between them. Cover them lightly with a kitchen towel and let them rise again until nearly doubled in size, about 30 minutes.
- Preheat your oven to 375°F (190°C). Once it’s hot and the loaves have risen, you might brush the tops with a little olive oil for a golden crust. Bake the bread in the preheated oven for about 25 minutes, or until the loaves are golden brown and sound hollow when tapped.
- Remove the baked bread from the oven and place them on a wire rack to cool. This prevents the bottoms from becoming soggy. Let the bread cool completely before slicing to ensure the structure sets properly, making it easier to slice and fill with your favorite sandwich ingredients.
Conclusion
Sub bread is not just a base for sandwiches; it’s a versatile, flavorful canvas that invites culinary creativity. Whether you’re crafting a meaty Italian sub or a vegetarian delight, the bread’s sturdy yet tender nature makes it ideal for an array of toppings and fillings. By making your own sub bread, you control the ingredients, ensuring a healthier option compared to store-bought varieties.
The process of kneading and baking your own bread also brings a satisfying element of personal touch to your meals. Remember, the key to perfect sub bread lies in the quality of the yeast, the kneading process, and proper temperature control during proofing and baking. Embrace the process, experiment with flavors, and enjoy the delicious results of your homemade sub bread.